Learn how to create and use barcodes with Vernon CMS and simplify your collections management.
Overview
Recording location changes can be time-consuming and sometimes imprecise when done manually. Vernon CMS lets you create barcodes for your objects that you can print, attach to your objects, and then scan with a barcode scanner which connects directly to the system. This is an excellent alternative to manual data entry.
In this article, we’ll cover:
- How barcodes work with Vernon CMS
- Creating a report of barcodes
- Printing barcodes and attaching them to objects
- Pre-printed barcodes
- Scanning barcodes
- Tracking object movements
- Recording locations when offline
How barcodes work with Vernon CMS
Barcodes are basically a font that presents some kind of text data in a different format that can work with a barcode scanner. Instead of seeing a number, there’ll be a convention of different-width white and black bars which would be recognised by the scanner as a particular number.
You can use a barcode font in Microsoft Word, and you can change any piece of text to be presented as a barcode and that can then be read by a scanner.
Within Vernon there’s a few parts that make that work.
Unique identifier
Firstly, you need a unique identifier for the object records. That would either be the System ID field which is always present, or the accession number if that’s always unique in your system and doesn’t include too many unusual punctuation characters.
Word Merge report
Secondly, you can generate barcode labels directly from Vernon, and that’s using our integration with Microsoft Word Merge.
Barcode scanners
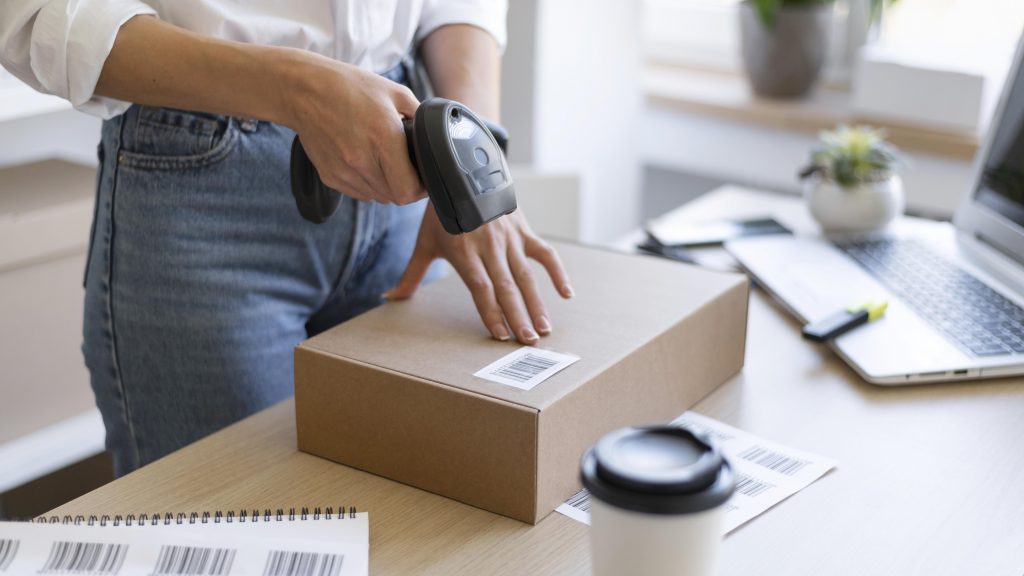
Lastly, you can use barcode scanners. This is either a USB scanner that’s plugged directly into a laptop or a computer, or a Bluetooth scanner where you can be further away from the computer. You can scan barcodes that have been either printed from Vernon or are pre-printed. This works in any field where you can search on objects. For example, the Search box, or the Object column in the Bulk Move screen.
Let’s look each of those different pieces and how all of that connects together.
Creating a report of barcodes
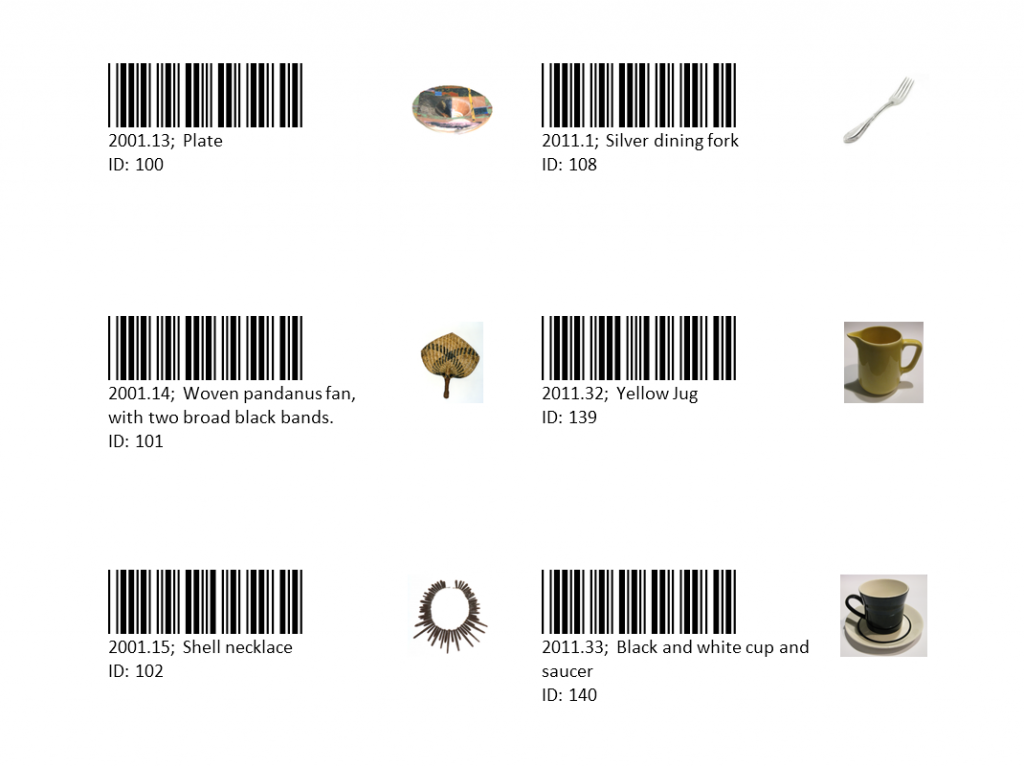
Here’s an image of barcode labels which have been generated directly from Vernon. We’ll take you through the steps to create your own report.
First, download and install a free barcode font, such as 3 of 9 Barcode Font. This is a popular barcoding font that’s supported by all common barcode scanners. There are a few different competing barcode standards so the most appropriate font depends on the barcode scanner.
Then, use our template to produce a report. We’ve done the hard work and formatted a template for you to use.
About the barcode report template
In this template, we use the System ID of a record for the barcode.
You could use the accession number, but some barcode scanners don’t cope with the more obscure punctuation. So, depending what punctuation you’ve got in your accession number that might be problematic.
Also, for some organisations, accession numbers aren’t always guaranteed to be unique. You might have historical duplicates. Or you might have accession number ranges where there’s a group record and subordinate records that might both be found when you try and scan that number.
So those are two reasons why using the System ID in barcodes usually works better. In the template, we’ve inserted “ID\” before the System ID placeholder, to ensure that Vernon finds the exact record.
We’ve also included other fields from the Object record so that this barcode label will be human-readable. We won’t be able to understand what the barcode represents just by looking at it. But if we include the accession number, the title, and the System ID fields as text, it’ll be clear what that record is.
That also provides us with a fallback option if the barcode is damaged in any way and the barcode scanner can’t scan it. You can still see the System ID and the accession number of that object on the barcode label, and you could type the ID number into a search field.
We’ve also included the primary image for that record. That isn’t necessary but again that just makes it easy to look at that label and be sure which object it is.
Step 1. Download the barcode report template
This Word Macro-Enabled Template contains the fields and layout for barcode labels.
Step 2. Format the barcode font
- Open the template.
- Select the large placeholder text that says «System_ID».
- Change the font to the barcode font that you installed.
Step 3. Save the template on your shared drive
- Go to File > Save as.
- Select a folder location to save your template. It should be somewhere everyone at your organisation can access, like a shared drive. You can also save report templates to the Wincoll > Reports folder.
- Save the template as a Word Macro-Enabled Template (.dotm).
- Selecting this option may move you to the Custom Office Template folder. Make sure you are in the folder location that you chose in step 2.
Step 4. Save the template in Vernon CMS
- Open Vernon CMS and click Report in the top toolbar, then select Object.
- Click Edit Report Template.
- For the Report Type, select Word Merge, then click Formatting Options.
- Select Use Existing Merge Layout Document.
- Click into the Document Filename field and click on the folder icon.
- Find your template, select it, and click Open. Then click OK.
- If your template does not appear in the folder you saved it to, your File Explorer may be set to Word Documents. Change it to Document Templates.
- Click Save Template and save your template in Portfolio.
Step 5. Run the report
You can now select your records and create a set of barcode labels with this saved report template. Everyone who wants to use this template must have the barcode font installed on their computer.
- In Vernon CMS, select your records.
- Click on Report in the toolbar.
- Open your barcode template. It may be in the list of Recent Templates or click More Templates to select it from Portfolio.
- Click Run Report and then click Screen. Your report template will open in Microsoft Word.
- In Word, go to View > Macros > View Macros.
- Select VSL Produce Report and click Run. Your report of barcodes will be generated.
Printing barcodes and attaching them to objects
You can now print your barcodes report. You may want to print it on special paper and laminate it. Then cut the labels out and attach them to the objects.
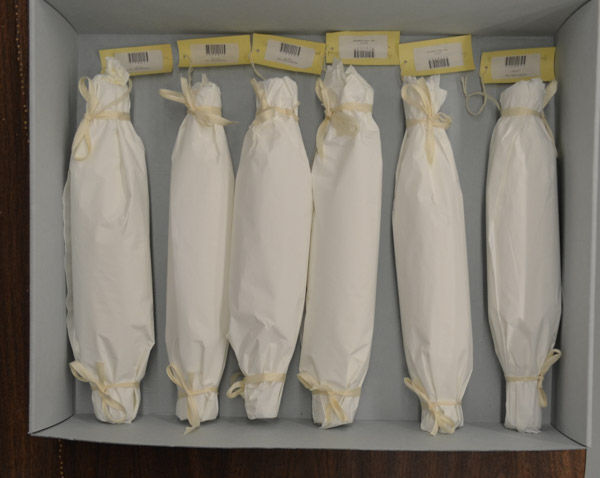
You can either attach them using conservation glue, or you could use swing tags where you’ve got a small piece of cord that ties the label to an object. Then it’s easily removable and doesn’t damage the object in any way.
Check out how Hagley Museum & Library have attached their barcode labels.
Pre-printed barcodes
Depending on the quality of your printer, you may have cases where the printing of the barcode is not sharp enough to be easily scanned by the barcode scanner. You may want to use pre-printed barcodes. They’re generated on high quality printers and they can get a slightly better result because of that.
If you’ve got pre-printed barcodes, then you can record the barcode number in the Other ID field in the Object – Identification window. Pre-printed barcodes have a long, random number embedded, and that will be printed as human-readable numbers underneath it. You’d enter that unique number into the Other ID field, and in the Type column you’d mark that that’s a barcode number.
The Other ID field is one of the key search fields in Vernon. So anywhere where you search objects, it’s looking at the ID number, the accession number, and any other identifiers that are stored in the Other ID field.
Adding the barcode number in this place would mean that the object can be searched using that barcode number anywhere else in the system.
Scanning barcodes
At Vernon Systems we have a barcode scanner from Zebra which was about two hundred dollars.
It’s a USB scanner so it’s got a three-meter-long cable. You can plug it into a laptop and you’ve got some distance to move around if the object’s not directly beside you.
Then you can just scan the barcode labels into any field in Vernon CMS where you could do a search. If you start with a blank Object > Identification window, and click into the main Search box, you can scan a barcode and open the record.
The scanner will look up the number embedded in the barcode. If it’s a System ID number, it will find the exact match.
That’s working because barcode scanners are treated as if they are just keyboard input into the computer. As far as the computer’s concerned, whatever characters were detected in that barcode are just sent to the computer as if somebody had typed them.
And you can configure a scanner to add an Enter key at the end of the text automatically.
What’s effectively happening is it finds a number in the barcode, it sends that to the computer and types that in, and then it automatically presses the Enter key which does the search.
And so that would work anywhere within the system.
You could go to List Manager for instance, and if you’re on a blank line, you can do the same thing and you can select individual objects and add them on there.
And as long as you just keep pressing the Down Arrow key to add new rows, you can keep adding more objects to that list. Most barcode scanners can also be configured to automatically add an Enter character after scanning the barcode and this is the best setting for use with Vernon.
Tracking object movements
Using barcode scanners is particularly useful when you’re keeping track of the movement of objects. You might have a set of objects that are in a storeroom and you’re about to load them on a pallet to move to an exhibition area.
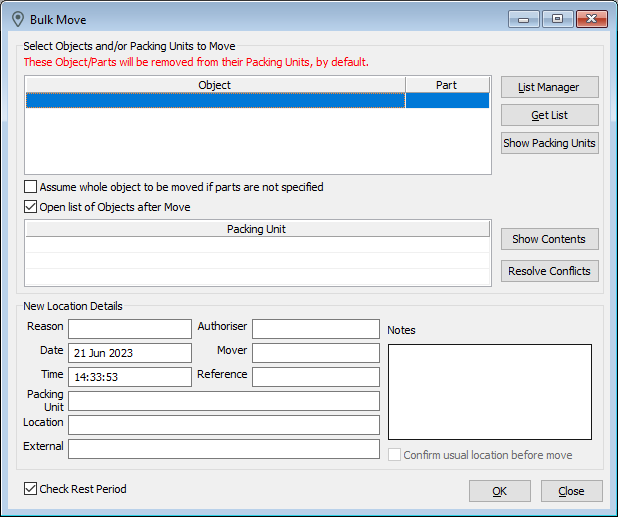
You could use the Bulk Move tool. And the same as before, the Object column here is a search field in Vernon.
If the cursor is in that Object column, I can scan objects and I can use the Down Arrow key to keep adding new rows to the list. And I could scan as many of those as I wanted.
If you had trouble with any of those barcodes, provided you’ve included some human-readable text on the label, you could still directly type into any field and manually add an object.
That might also be the case if one object has lost its barcode. You can still easily type in a reference number that’s maybe marked on that object to add it into the Bulk Move with all the others.
Recording locations when offline
We can also manage location moves in Vernon outside of the system. So that’s particularly useful if you’re in a location that has no connection back to the Vernon server.
Maybe you’re in a storage area and you just don’t have Wi-Fi in that storage area. Vernon supports that through a built-in spreadsheet that allows you to do location moves and later import those moves back to Vernon when you’re at your computer.
When you’re using the spreadsheet, you can scan object barcodes and their corresponding number, for example the System ID number, will be entered into the Object Details column.
However, because you’re not connected to Vernon, you’ve got to make sure you’re scanning the right label. You can review the number the scanner enters to check that it’s correct. If you had several barcodes that were close together for instance, you don’t want to accidentally scan the wrong one.
You can just keep scanning more and your cursor will automatically move to the next row for you. When you’re ready, you can import this data back into Vernon.
To read more about this process, see Record your location data offline and import it.
So why not start a project to introduce barcodes at your organisation? You’ll improve security, efficiency, and accuracy, and make it easier to manage and monitor collections.
Find out more about barcodes
Video
Barcodes Webinar (YouTube)
Barcode advice
Barcodes: A Helpful Tool for Museums Collection Management – Arna Bontemps Museum


[…] Explainer: Barcodes Learn how to create and use barcodes with Vernon CMS and simplify your collections management. […]