Learn about how the Photo/Audio-Visual file works in Vernon CMS. This article explains how to add images to your records, import and link images in bulk, store and name your images, and fix broken image links.

Overview
In this article, we’ll look at how you can add images one-by-one in the system and then see how you can add images in bulk to save you time when you’re doing your digitisation projects. We’ll then look at some tips on how you can manage your image folders. Lastly we’ll see how we can fix any broken image links that are in your system.
On this page:
- How Vernon adds and links images
- Adding a single image
- Viewing images
- Adding images in bulk
- Adding large images
- Organising your image folders
- Fixing broken image links
How Vernon adds and links images
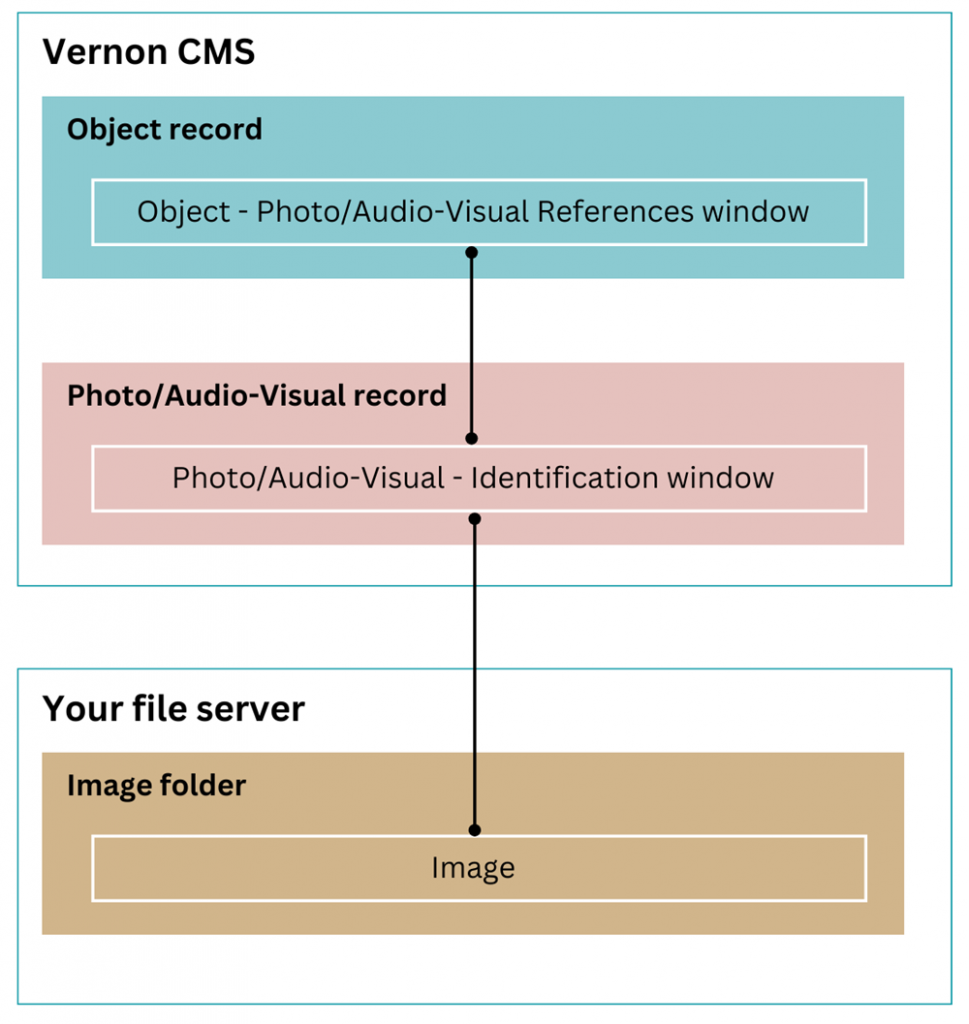
If you want to add an image to an Object record, the image must have its own record in the Photo/Audio-Visual file.
Your Object record connects to the Photo/Audio-Visual record through the Object – Photo/Audio-Visual References window.
The Photo/Audio-Visual record stores the file path of the image. It doesn’t store the image itself. It just keeps the link of where that image is saved on your file server.
Adding a single image
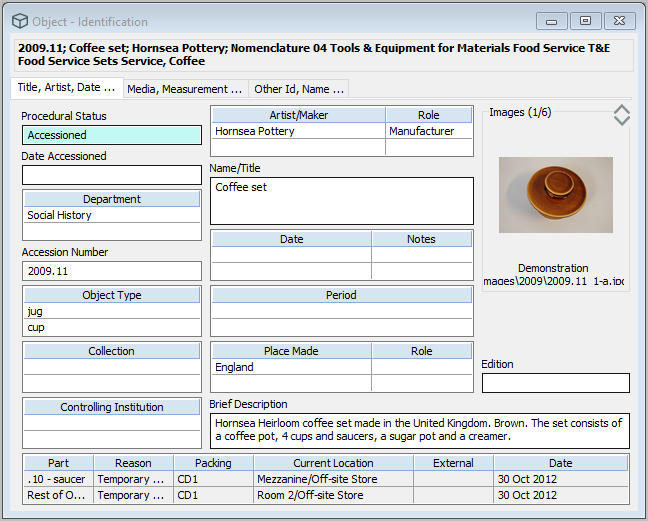
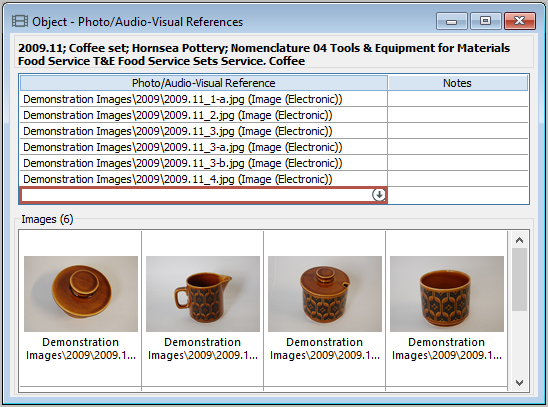
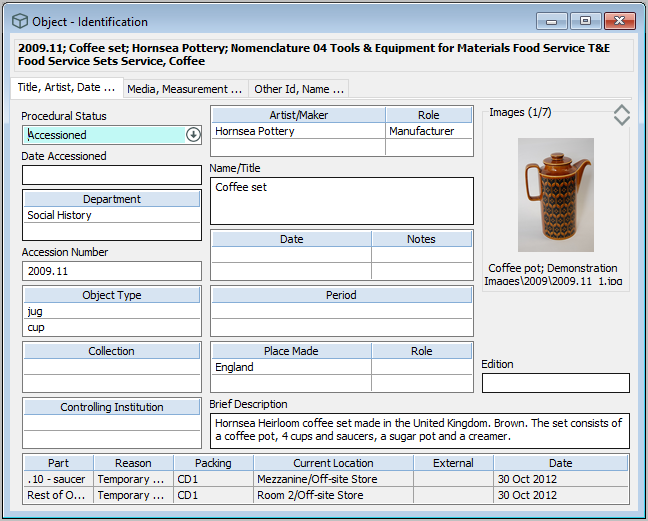
Let’s open an Object record from our Vernon CMS Demo system. This is a coffee set, and there are already six images linked to this record. We’re going to add an image of the coffee pot and make it the primary image, so it displays first.
In the Object – Identification window, we can see a thumbnail of the first linked image. Vernon has created that thumbnail from the original image. You can double-click on the thumbnail and Vernon will retrieve the original image from where it is stored and display it in the image viewer.
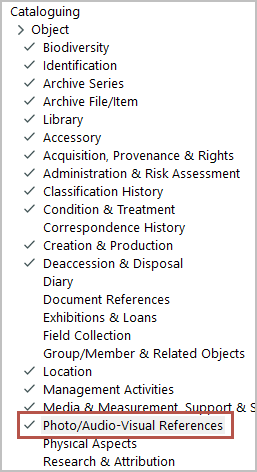
To add an image, we go to the Navigator on the left of Vernon CMS and open the Photo/Audio-Visual References window.
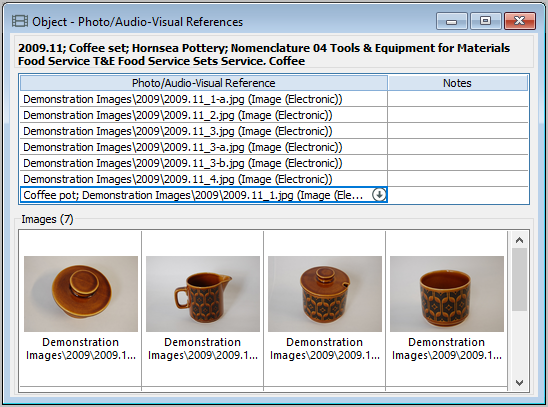
In the Object – Photo/Audio-Visual References window, click on the next blank row in the table.
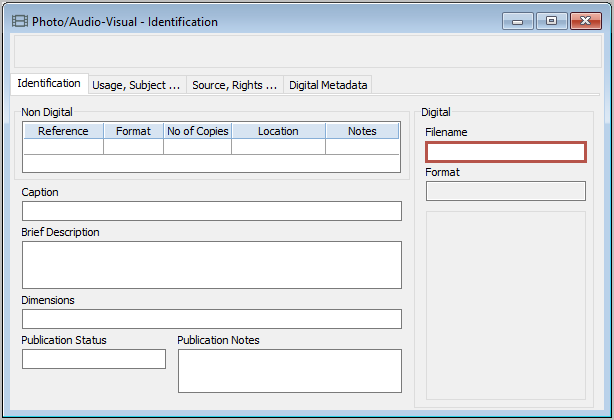
Then click the Go To button on the toolbar to open a new Photo/Audio-Visual record.
We can now connect the Photo/Audio-Visual record to the image. The key field is the Digital Filename field.
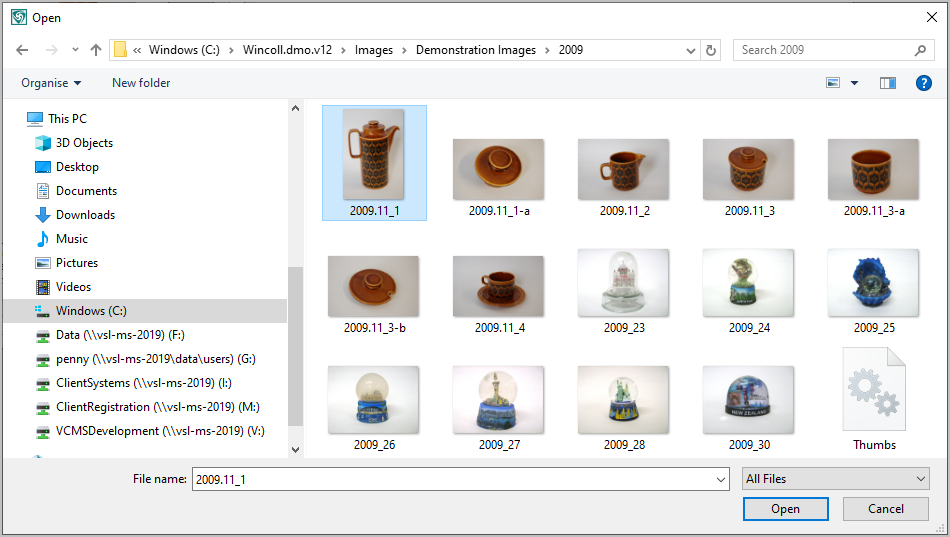
We can click into the Filename field and then click on the folder icon. That opens File Explorer and we can navigate to the image folder, select the image, and click Open.
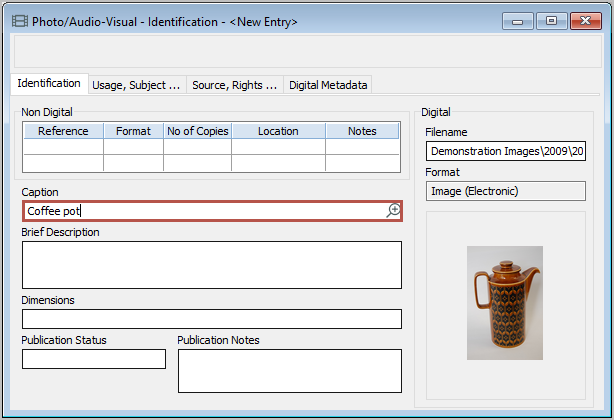
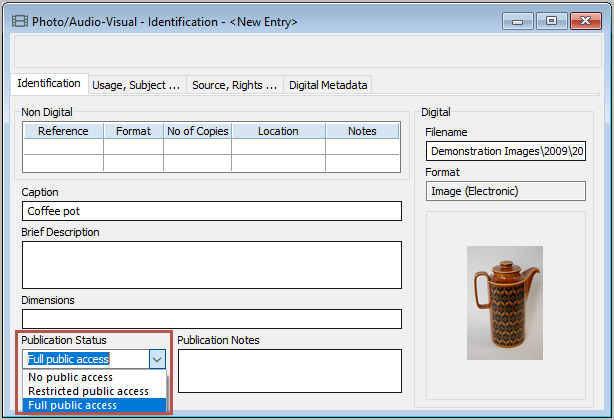
Now that our image is linked to the Photo/Audio-Visual record, let’s add a caption in the Caption field. This will help us search for the record later. If you use Vernon Browser, you can choose whether these captions are published to the website.
Your organisation might have rules about what kind of information you’ll be putting into Vernon about different images.
Another key field is the Publication Status field where you can say if the image has no public access, restricted public access, or full public access.
If you are publishing from Vernon CMS to any online collections, you might decide that if the image is a condition photo, you don’t want it to go on your public website and so you would select No public access.
But if the image is a high-quality picture that you want to have displayed publicly, you can choose Full public access.
If your collection isn’t available publicly then you might not have to worry about this at all. But setting the publication status now might save you issues if you do decide to go online in future.
Let’s save the Photo/Audio-Visual record by clicking the Save button on the toolbar. The record will go blank, which means it has saved successfully.
Then we can close the Photo/Audio-Visual record, and we’ll see that it’s now linked in the Object – Photo/Audio-Visual References window.
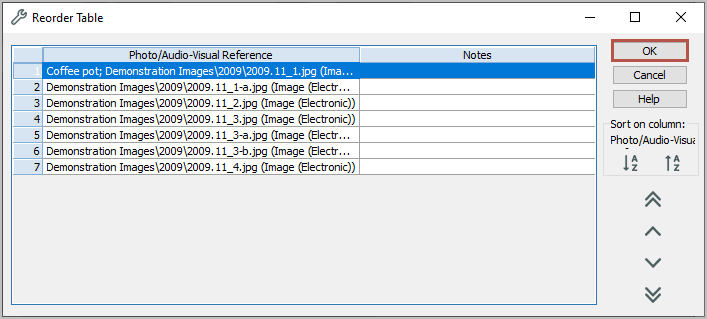
We want this new image to be the primary image. Vernon always uses the top row of the Photo/Audio-Visual References table as the primary image. That means we need to reorder the rows of the table to put this new image at the top. We can reorder the table like we can with any table in Vernon.
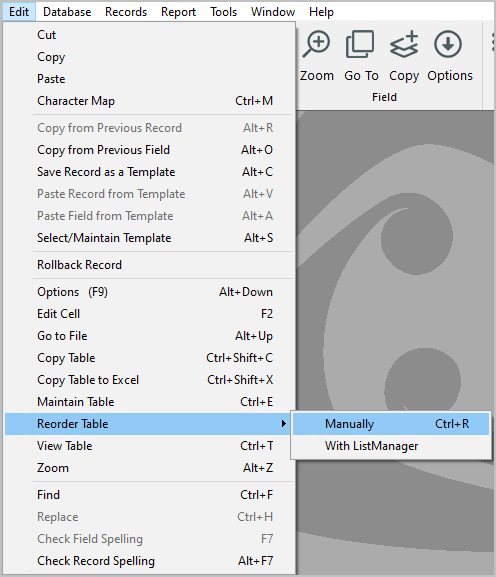
We can go to the Edit menu and then go to Reorder Table and click Manually.
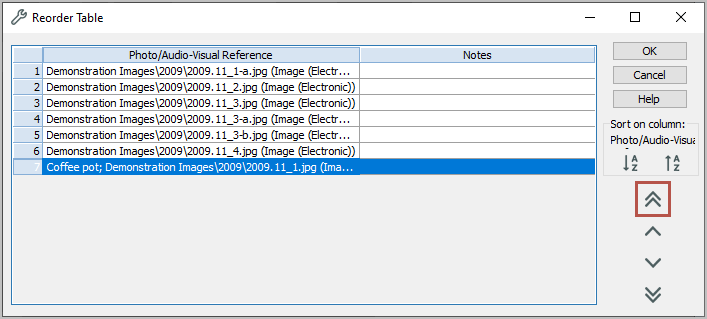
Now we can move this new image to the top of the table by selecting the row and clicking the double up arrow button.
Then we can click OK.
We can now close the Photo/Audio-Visual References window, and the new image is on the Object – Identification window as the primary image. Our last step is to save the Object record.
Viewing images
If there is more than one image linked to an Object record, then when you double-click on a thumbnail image to open the original image in the image viewer, you can browse between the images with the arrow buttons.
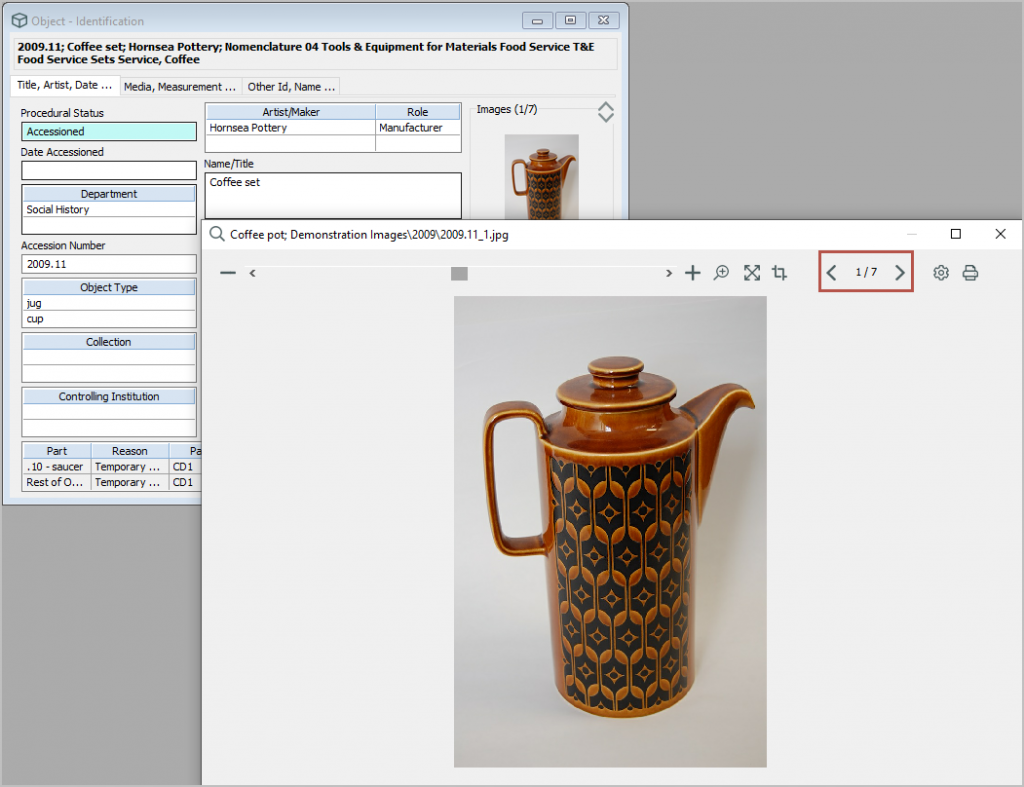
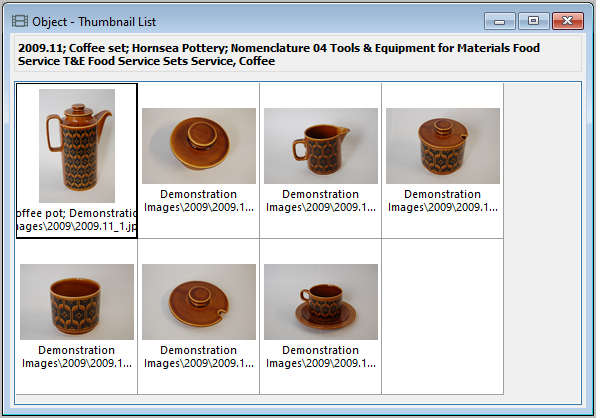
Another way to view your images is to click the Image button on the toolbar – it’s at the very top-right of Vernon CMS.
This opens a little window that shows thumbnails of all the images linked to a record. You can make that window smaller or larger as needed. So if you have a window open that doesn’t show the thumbnails directly in the record, you can have the thumbnail window open to see the images. This is really great in browse lists.
Adding images in bulk
Often when you’re adding images, you want to do it in bulk. You can do this with the Import & Link Images tool. As the name implies, it can import your image file paths and create Photo/Audio-Visual records, and optionally you can link those records to your Object records.
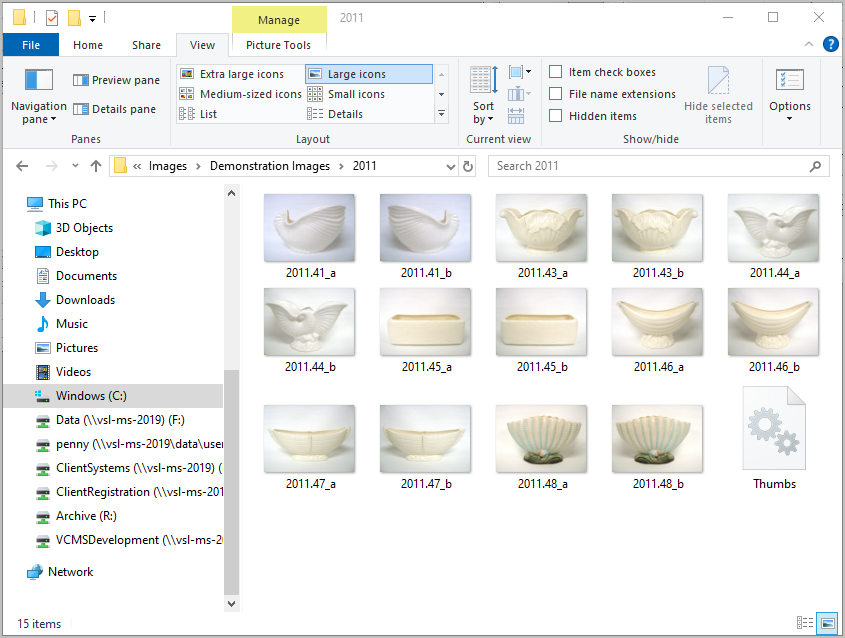
Here are some images that need to be added to Vernon.
You might notice that the file names have the accession number first and are followed by an underscore (_) and then a suffix of a or b. For example:
2011.41_a
2011.41_b
The reason we use an underscore before the suffix is because the Import & Link Images tool can go through the image folder and use the accession number that’s in the file name to identify matching Object records. The underscore tells Vernon where the accession number ends, so Vernon knows to ignore everything after that character when looking for matches.
Usually accession numbers contain dots or dashes to separate the segments. So we recommend using a character, such as an underscore, that isn’t in any part of your accession number. Then Vernon will know immediately where the accession number finishes because it will read the same character each time. So you can put detail in your filename, you can put anything you’d like after the underscore.
It is good to be consistent with how your organisation does it. Some people use p1, p2, p3, to indicate multiple photos for the same object. Others use a, b, and c. You can use descriptions or artist names or a whole range of other things.
You can match your images to your Object records with either their accession numbers or with their System IDs. Most of the time we tend to use accession number because it’s a human-readable number and is familiar to us. We use accession numbers as our daily practice in museums.
But if for some reason you’re wanting to create records where there’s duplicate accession numbers, and there’s uncertainty about which record it might go to, you can use System ID instead. Remember, your image file names would have to include the System ID as the first part of the name.
So let’s import and link these images to their Object records. A good rule of thumb is that before you use any bulk tools, make sure you close all windows. If you have a record open that you’re wanting to change in a bulk tool, Vernon won’t be able to update the record as it’s already locked by the system in the data entry window. There may be unsaved changes in the data entry window that would be lost without this automatic record-locking. So close all your windows first.
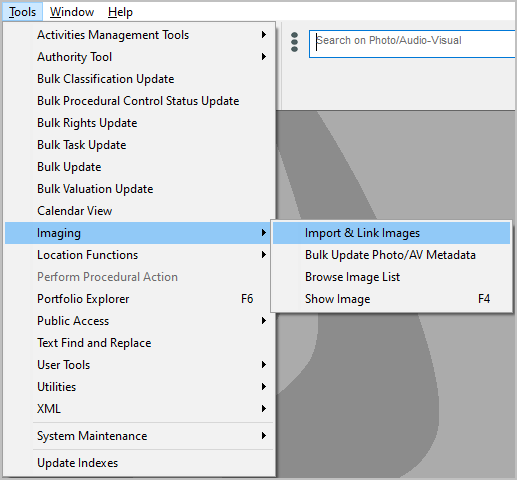
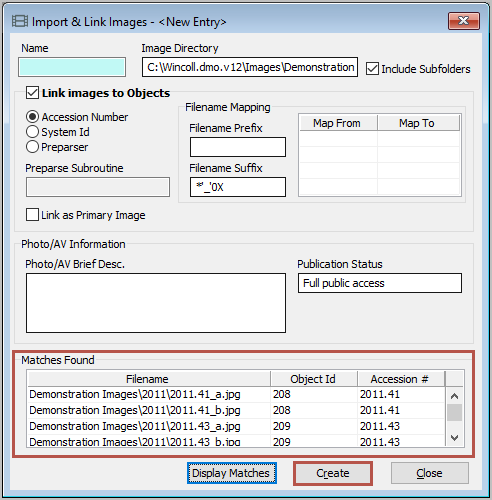
Let’s go to the Tools menu, then go to Imaging and click Import & Link Images.
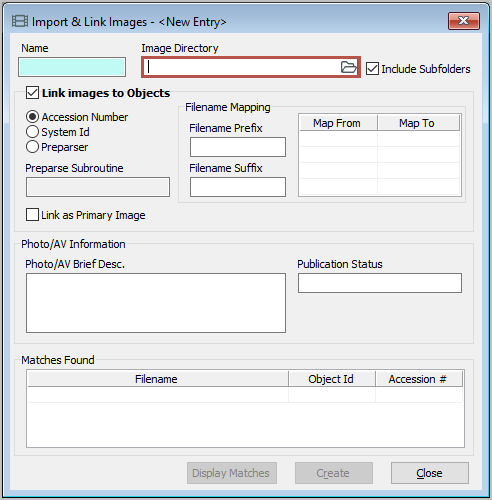
The first thing we need to do is tell Vernon where to look. We can click into the Image Directory field and click the folder icon.
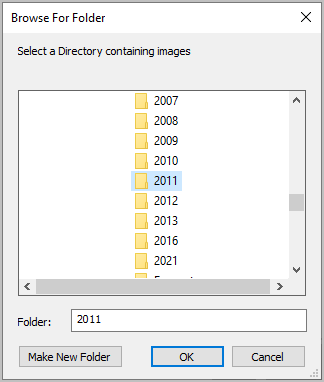
Then we can find the image folder. We could point Vernon at the top image folder that contains every single image for Vernon. Vernon will go through and find everything that has an accession number and try and match it to an Object record. We don’t have to worry about images that are already linked as Vernon will ignore them. But we can run it through our entire collection of images and see what’s out there that needs to be linked.
But in this case, we just want to look in the 2011 folder.
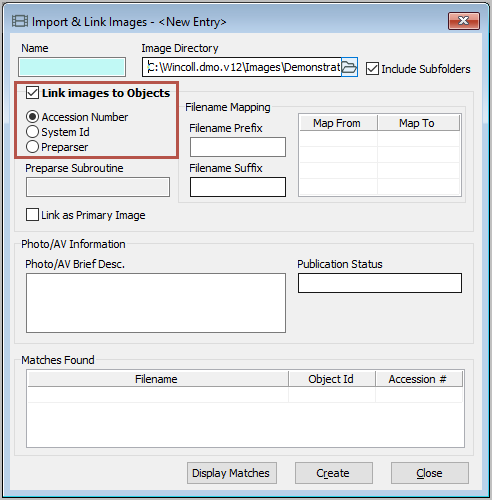
You’ll notice that the settings Link images to Objects and Accession Number are selected by default. This means that Vernon will import the image file paths and create Photo/Audio-Visual records, and then link them to Object records by their accession number.
You can also use this tool to import and create Photo/Audio-Visual records, but not link them to Object records. So if you wanted to import images for a Person or for an Event or an Exhibition, you can use the same tool, you just need to untick the Link images to Objects checkbox.
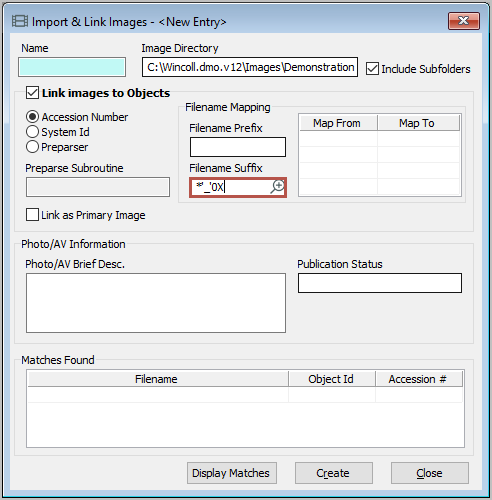
In the Filename Suffix field, we tell Vernon the character that separates the accession number from the rest of the file name. And so we need to enter a bit of code:
*’_’0X
You don’t have to memorise this code. When you’re clicked into the field, you can press F1 on your keyboard which will open a help article in your web browser. You can then copy and paste the code into the field.
If your image file names use a different character to delimit the suffix, you can change the underscore to whatever character you’re using. We’re just saying to Vernon, ignore everything after this character.
The Map From and Map To fields are for people who have characters in their accession numbers which aren’t valid in Windows files, such as colons or slashes. Because Windows doesn’t let you save file names with these characters, you may have used a character such as a hyphen in your image file name instead.
You can tell Vernon that wherever it sees a hyphen, to read it as a slash, so that it can match your image filenames to the accession numbers of your Object records. You would enter a hyphen (-) in the Map From field, and a slash (/) in the Map To field.
That means you can get around Windows naming conventions for your images and still use this tool.
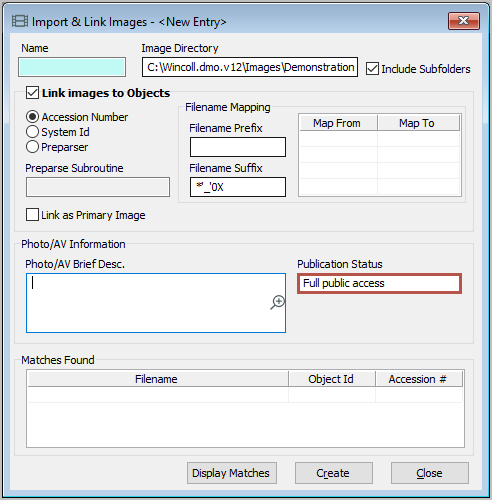
You can set the Publication Status for everything that you’re importing. So if you know that all the images can be or should not be publicly viewed, or not to be public, you can set that access. In this case, we want them to be fully available for the web, so we’ll select Full public access, but you can also leave this blank.
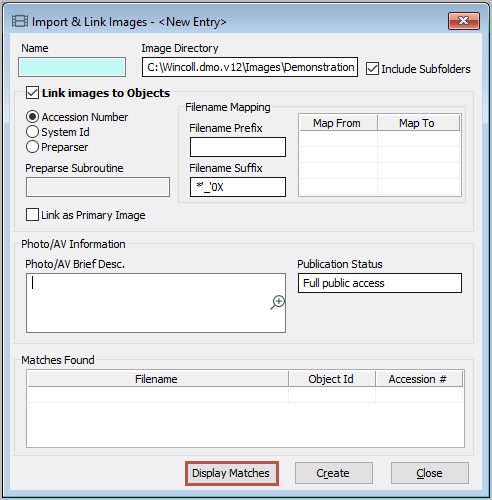
We’re all set up, we’re ready for Vernon to go through the image folder and find all the matches. So we can click the Display Matches button.
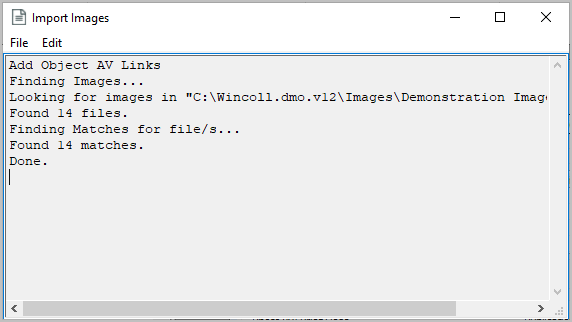
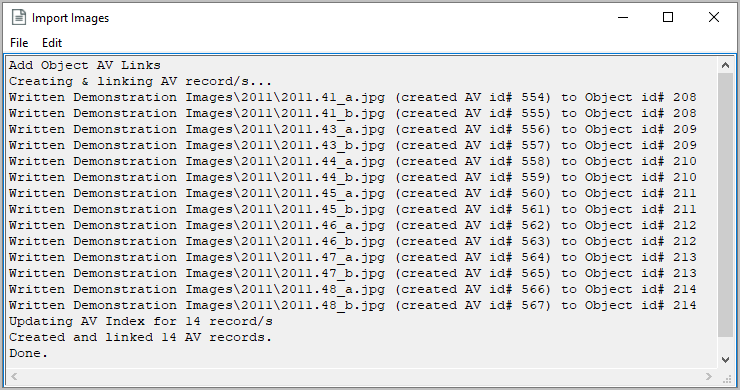
Vernon will look through the image folder and identify the files. Then it will look through the Object records and find matches for those images. In this case, 14 matches were found.
We can close the report window and then we’ll see the list of matched Object records in the Matches Found table.
We can look through the table and make sure we’re happy with the matches. And then click the Create button.
Vernon will then go create all the Photo/Audio-Visual records and link them to the Object records.
When it’s done, it will open up browse lists of your new Photo/Audio-Visual records and updated Object records.
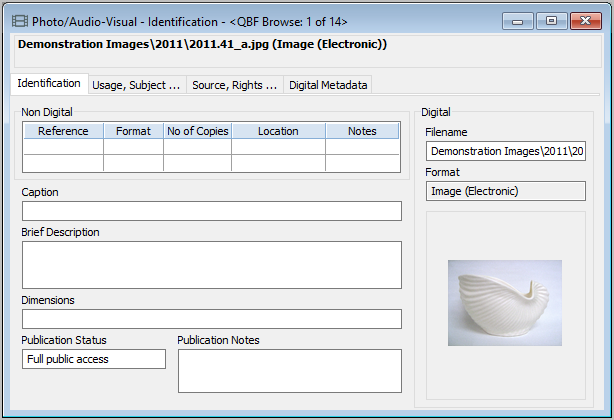
We have our 14 Photo/Audio-Visual records:
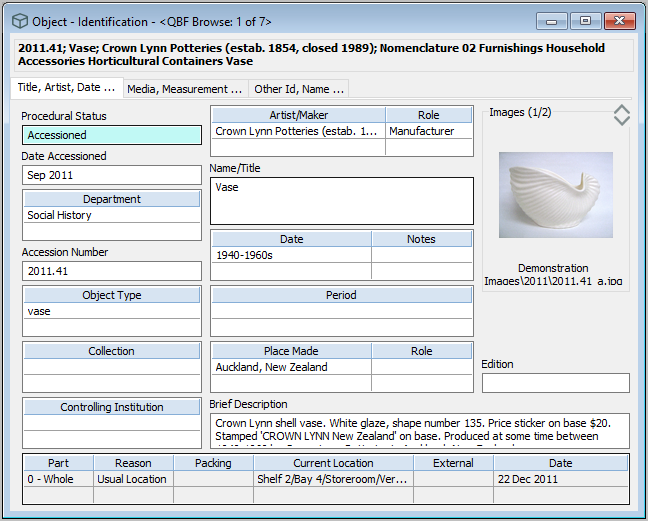
And our seven Object records which are now linked to the Photo/Audio-Visual records:
Adding large images
We recommend that images are no more than 3,000 pixels on the longest side. That’s actually quite small. It’s good for the web but it’s not a very large image.
If you have tiffs or larger images that you want to link to Vernon, we don’t recommend creating Photo/Audio-Visual records for them. That’s because Vernon compresses the original images to create the thumbnails. So any part of the system that accesses the original image, such as publishing images to Vernon Browser, will slow down if you have extremely large images.
If you’ve got a collection of only about 1-2,000 objects, you have a higher tolerance. But if you have closer to a million objects, this can have a really big impact on performance.
For large images, we recommend linking them in the Document References window, in the External File table. You can double-click the entries in this table to open and view the images in the image viewer.
Organising your image folders
Let’s talk about where you keep your images in your folder structure. In the examples in this article, images are grouped into folders by year. Mostly because we recommend that you don’t put more than 500 images into one folder. It’s a very arbitrary number. Obviously, things aren’t going to break if the number goes to 501 or 502.
But a set of 500 images is about the amount that you can easily scan through. It’s also less pressure for Vernon to be trying to scan through that folder to find the correct image.
It’s also really important to make sure that your image folder is on a shared drive that everybody can access. If you’re linking images from your desktop, you’re the only person who will ever see them.
You can use the Images folder that’s in the Wincoll folder where Vernon lives, as everyone who has access to Vernon will then automatically have access to the Images folder. Or you may have a folder in a different location. Just make sure that everything is together in one place and people know that these are linked to Vernon and they need to be treated differently and more formally than you might with other images where you notice a spelling mistake in the name.
That’s because Vernon’s not copying an image, it’s remembering where it lives. So if you rename the folders or rename the image, that link is broken. Vernon will lose where that image is.
So in this case, the folder structure is by year of accession. There’s a whole range of ways you can do it. Some people have grouped them by artist names or they’ve created ranges of numbers like T100 to T1000. As long as you group your folders by something that won’t change.
Don’t name your folders by exhibitions because exhibitions may change or objects might move between different things. You want to choose something that’s going to be consistent and always the same so that you’re not tempted to rename things.
Fixing broken image links
If you do break image links in Vernon by moving or renaming folders, you can fix this issue with the Text Find and Replace tool. You can use it to remove a folder from your file path or insert a folder in your file path. You can also use it to find an older folder name and replace it with the new folder name. For more information, see Change your image file paths.
If your image directory (the top or ‘parent’ folder) has changed or moved to a different location, see Change your external file directories.
If neither of these approaches fixes the issue, then if you have supervisor access, you can run a few different System Monitor commands. For more information, see Fix broken image links with System Monitor.
Video
Further information
We hope this explainer article has helped you understand how images work in Vernon. For more information, see the Images and documents section of the Vernon CMS Help website.


[…] Learn about images and Vernon CMS […]